Create New
Topics on this post:
Overview
It is an interface that you will fill out the necessary information to create a new post.
Navigation
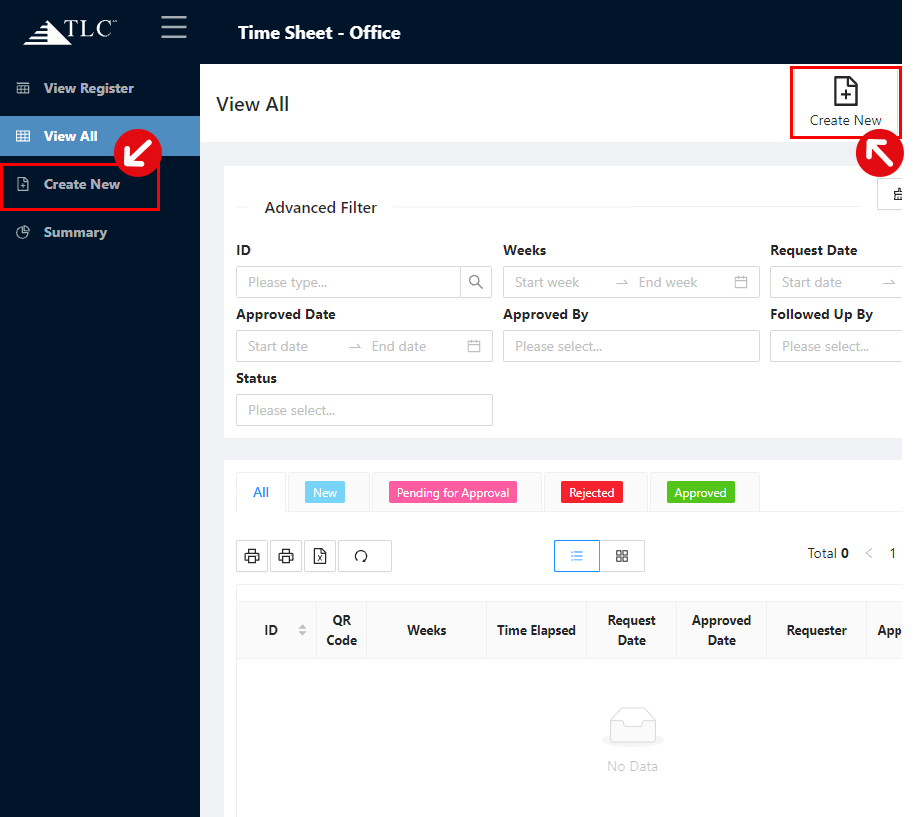
There are two ways to create a new post: clicking on the Create New button at the top right corner of the page or in the left side menu.
Structure
After clicking on the Create New button, the screen will be changed to the below interface.
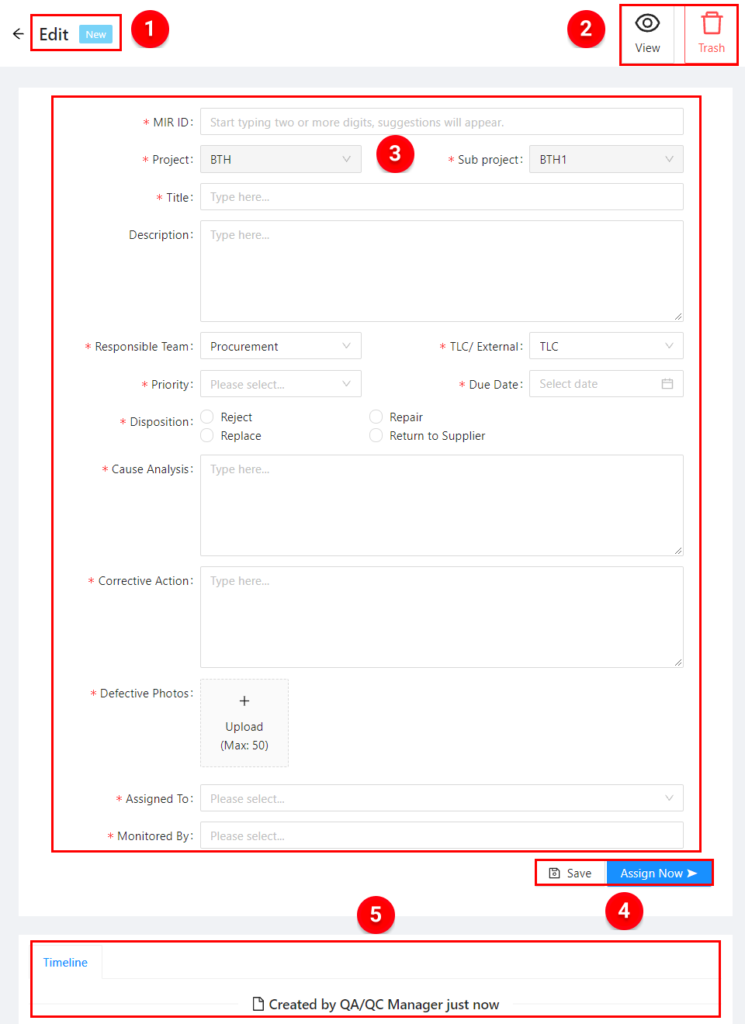
![]() Status Bar – Show the current status of the post.
Status Bar – Show the current status of the post.
![]() Action Bar – View the current post in the print view or delete the current post (depending on your role of the app)
Action Bar – View the current post in the print view or delete the current post (depending on your role of the app)
![]() Form – Where you will fill out the information of the post. You need to know these disciplines below:
Form – Where you will fill out the information of the post. You need to know these disciplines below:
- The fields with a red asterisk – is required to input.
- The fields is disabled with a grey color – can not edit.
- The fields is available content – set default but can edit.
- The fields with uploading photos or files – the maximum number is 50 and its format will be limited.
- The Assignee To field – is allow to select only one user who deal with the task or approve the form.
- The Monitor By/Followed Up By field: can select at least one user who involves in the post
![]() Change Status Button – you can save your post if it is unfinished by clicking on the Save button, or change to another status by clicking on the Blue button. A user has to fill in all the required information prior to saving the post or changing to another status.
Change Status Button – you can save your post if it is unfinished by clicking on the Save button, or change to another status by clicking on the Blue button. A user has to fill in all the required information prior to saving the post or changing to another status.
![]() Timeline – where you can see the process of the post and its comments in that process. For example, who created the post, what is the requester or the approver comments, and which statuses the post has been changed to.
Timeline – where you can see the process of the post and its comments in that process. For example, who created the post, what is the requester or the approver comments, and which statuses the post has been changed to.
Note – To make the form more friendly and easier for users, some fields of the form have the placeholder or are filtered out by other fields. May you have a good trip.