NZ Leave Application (LA)
Topics on this post:
Overview
This form is used to book leave days for NZ Teams.
Workflow
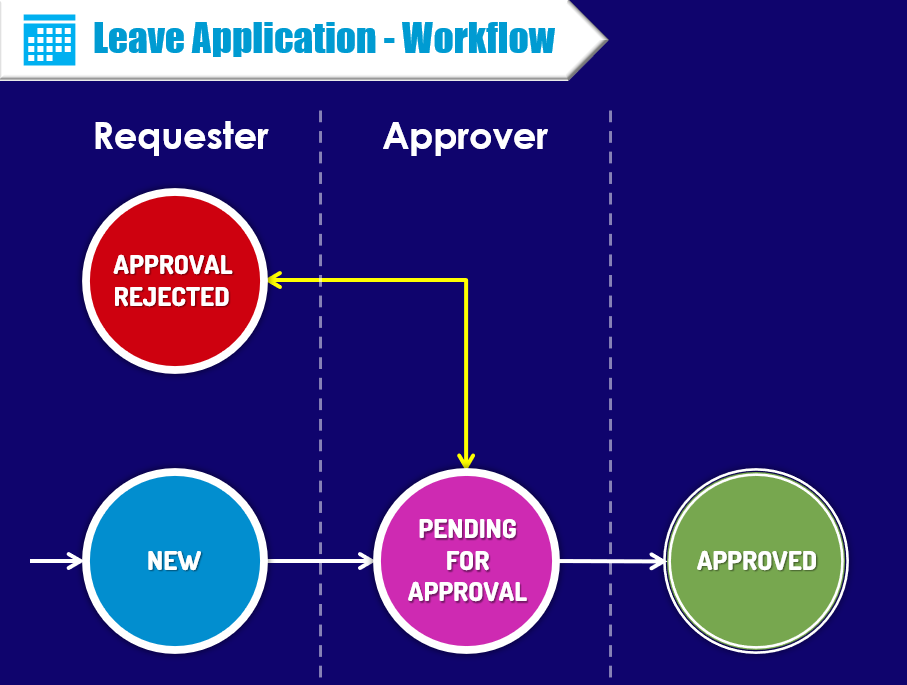
Firstly, the user will create a new Leave Application. Then it will be changed to the Pending for Approval status.
After that, the Approver will review the LA. The approver will change it to the Approved status if it is correct. Otherwise, the Approver will reject the document to the Requester.
Regarding the Approval Reject status, the Requester will amend the issue and submit it to the Approver again. That process will be looped until the timesheet is acceptable and changed to the Approved status.
No one can edit the read-only fields of the document after it is approved.
Navigation
Please click on this link to get the NZ Leave Application after login.
View All
The View All page will show the documents which depend on your level in the company.
- If you are a team member, you can just only see your own LA.
- If you are a team leader or a manager, you can see the LAs of your team members and your own LA.
- If you are delegated (e.g. HR Manager), you can see either your normal viewport or your delegated viewport.
- In case, you are a manager or higher level and your team has a lot of members at several levels, you can see a multi-structure level tree explorer.
Create New
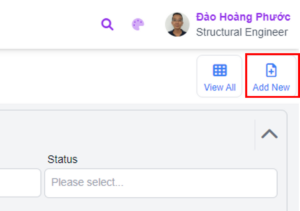
To create a new leave application, please click on the “Add New” button on the top right corner of the page.
Then, please input the general fields and create the document.
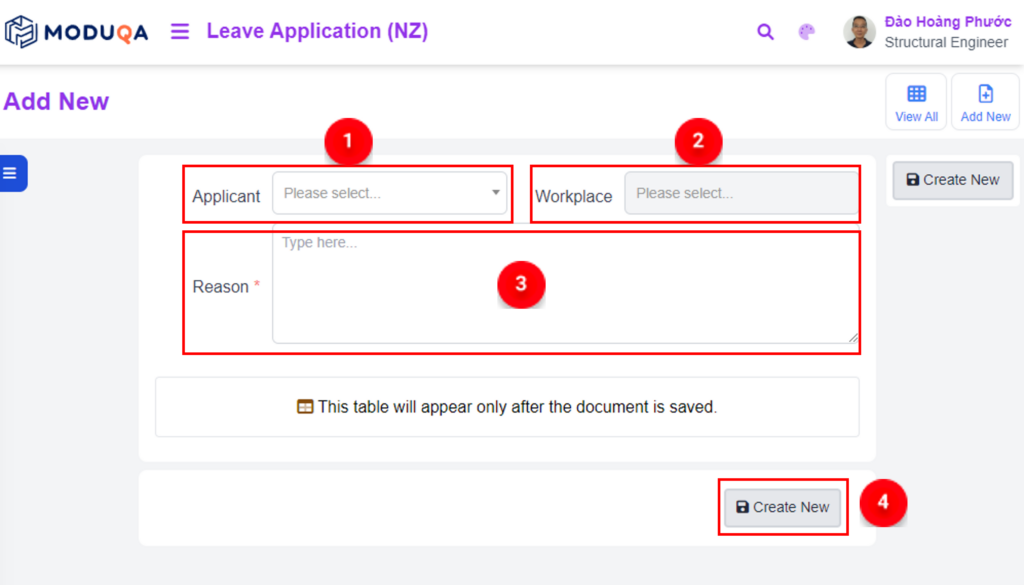
![]() Applicant – select your name in the dropdown box.
Applicant – select your name in the dropdown box.
![]() Workplace – shown default when the applicant is selected.
Workplace – shown default when the applicant is selected.
![]() Reason – is compulsory to input. User input the reason for their leave dates.
Reason – is compulsory to input. User input the reason for their leave dates.
![]() Create New button – user click on this button to save the document and do the next steps.
Create New button – user click on this button to save the document and do the next steps.
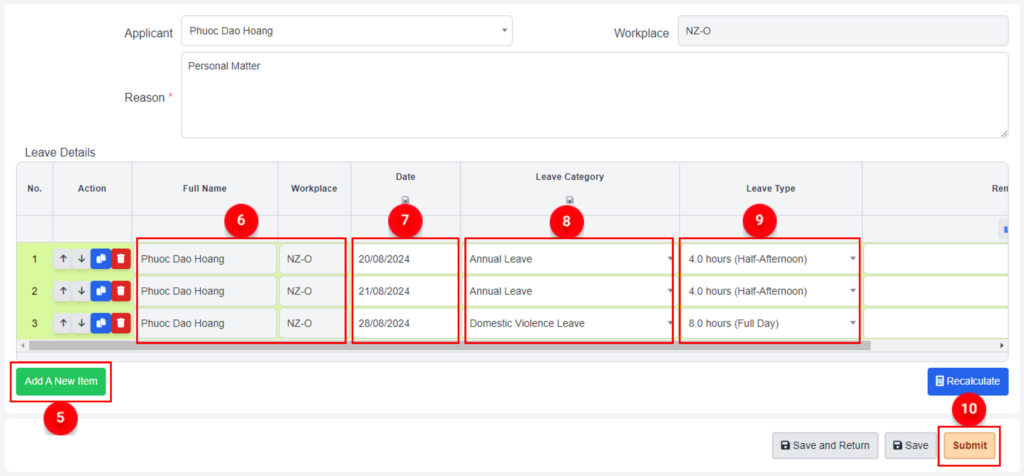
![]() The “Add New Line” button: click on this button to add a new line for inputting your leave date and relevant information.
The “Add New Line” button: click on this button to add a new line for inputting your leave date and relevant information.
![]() Employee Information: shown automatically and default based on the selected applicant.
Employee Information: shown automatically and default based on the selected applicant.
![]() Date – select or input the date the user wants to request to leave off.
Date – select or input the date the user wants to request to leave off.
![]() Leave Category – select the leave category for which you want to book a leave request.
Leave Category – select the leave category for which you want to book a leave request.
![]() Leave Type – select the amount of time that you want to leave off.
Leave Type – select the amount of time that you want to leave off.
![]() Submit button – click on this button to submit the leave application to your line manager/delegated approver.
Submit button – click on this button to submit the leave application to your line manager/delegated approver.
![]() Users will contact Ms. Hiep HR to know the remaining leave fund for every leave category. In the TLC App, users only book the day they want to leave off.
Users will contact Ms. Hiep HR to know the remaining leave fund for every leave category. In the TLC App, users only book the day they want to leave off.