Timesheet Worker (TSW)
Topics on this post:
Overview
The Timesheet Worker is for factory supervisors to do timekeeping for their workers.
Supervisors create timesheets weekly for their own team.
Workflow
The Timesheet Worker workflow is described in the below diagram.
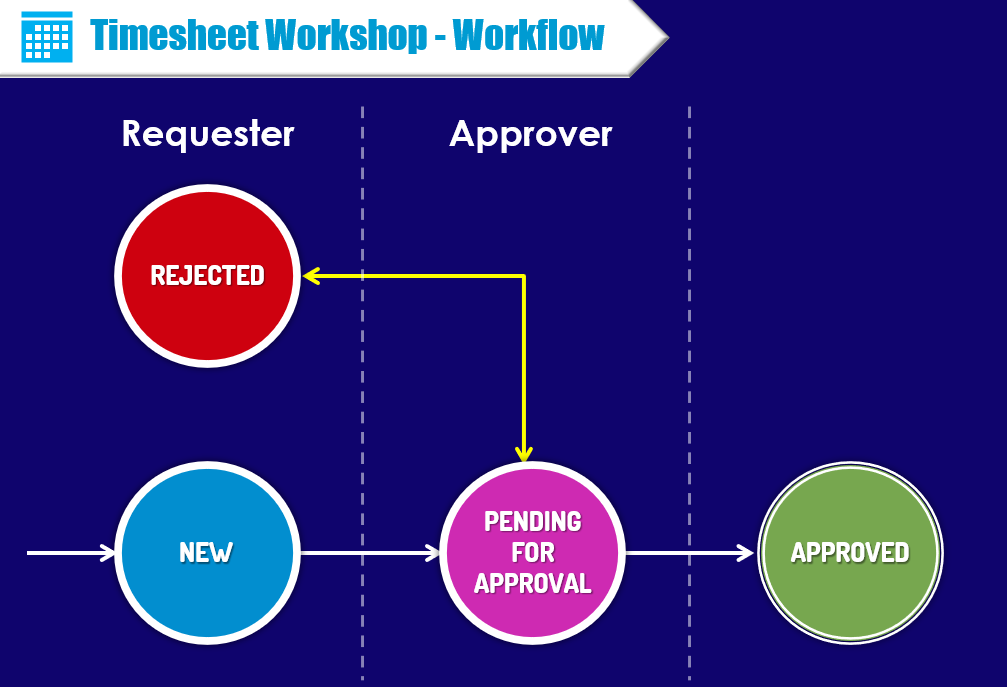
Firstly, the user will create a new Timesheet. After inputting data, it will be changed to the Pending for Approval status.
After that, the Approver will review the Timesheet. If it is correct, the Approver will change its status to the Approved. Otherwise, the Approver will reject the document to the Requester.
In terms of the Reject status, the requester will amend the issue and submit it to the Approver again. That process will be looped until the timesheet is acceptable and changed to the Approved status.
No one can edit any fields of the document when it is approved.
Navigation
To get the Timesheet Worker App after login, please see App Drawer.
View All
The View All page will show all the documents which depend on your level in the company.
(Viewport?)
For Advanced Filter, Item Table, Screen Options, please see View All.
Create New
To get the overview for creating a new document, please see Create New.
Prior to creating a new TSW, you should make sure your team members are available and correct.
To create or update your member team lists, please see Production Team.
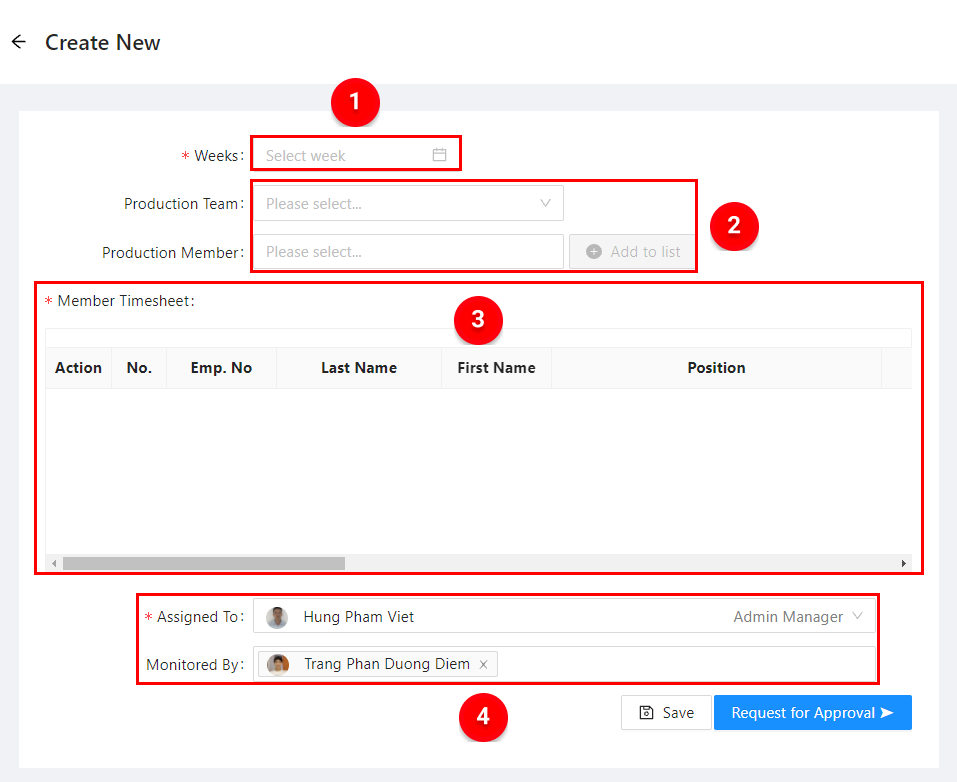
![]() Weeks – select a week by picking a date in this week. Your TSW is reported weekly.
Weeks – select a week by picking a date in this week. Your TSW is reported weekly.
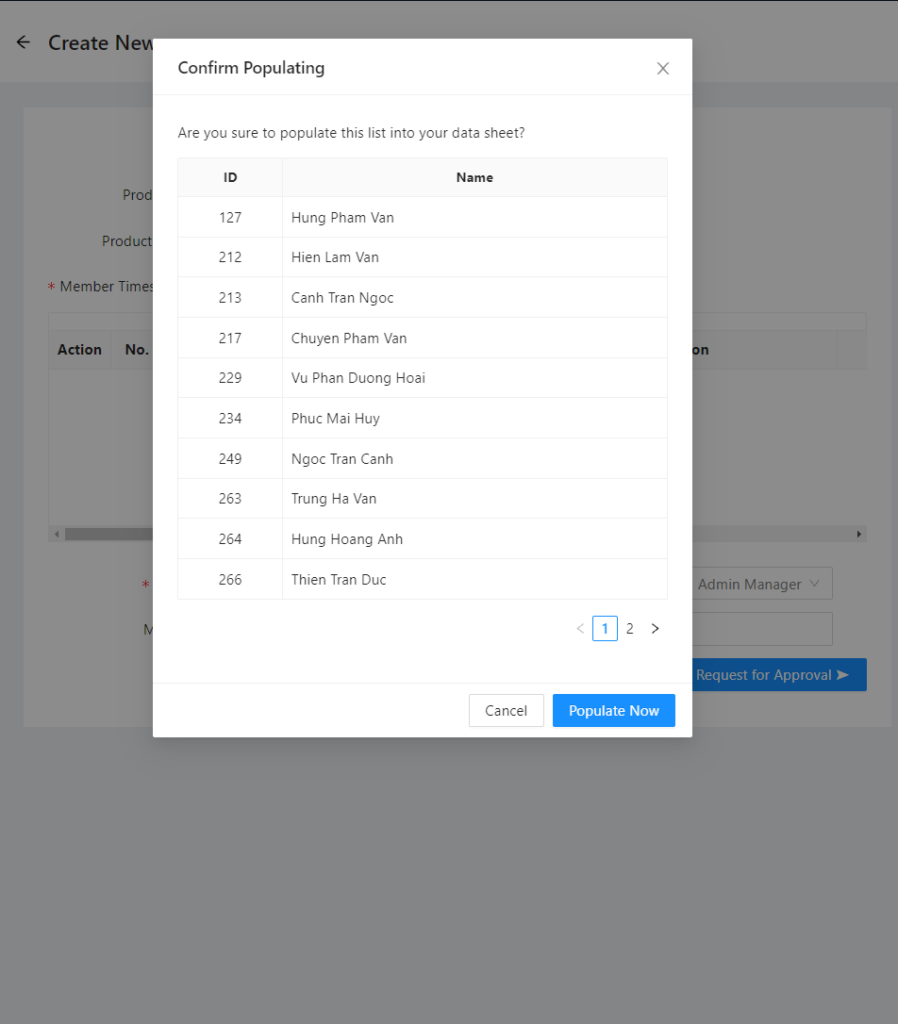
![]() Production Team & Member – select your team name (which is created in the Production Team app). You have to double-check the member list shown. If it is correct, please click on the “Populate Now” button in order to add your members to the member timesheet table. In contrast, cancel it so that you can add another team.
Production Team & Member – select your team name (which is created in the Production Team app). You have to double-check the member list shown. If it is correct, please click on the “Populate Now” button in order to add your members to the member timesheet table. In contrast, cancel it so that you can add another team.
You can only select one team for a TSW. After the team member list is added to the member timesheet table, you can not change the team anymore. If you need to change, do not save the form, and please refresh or F5 to reset the form.
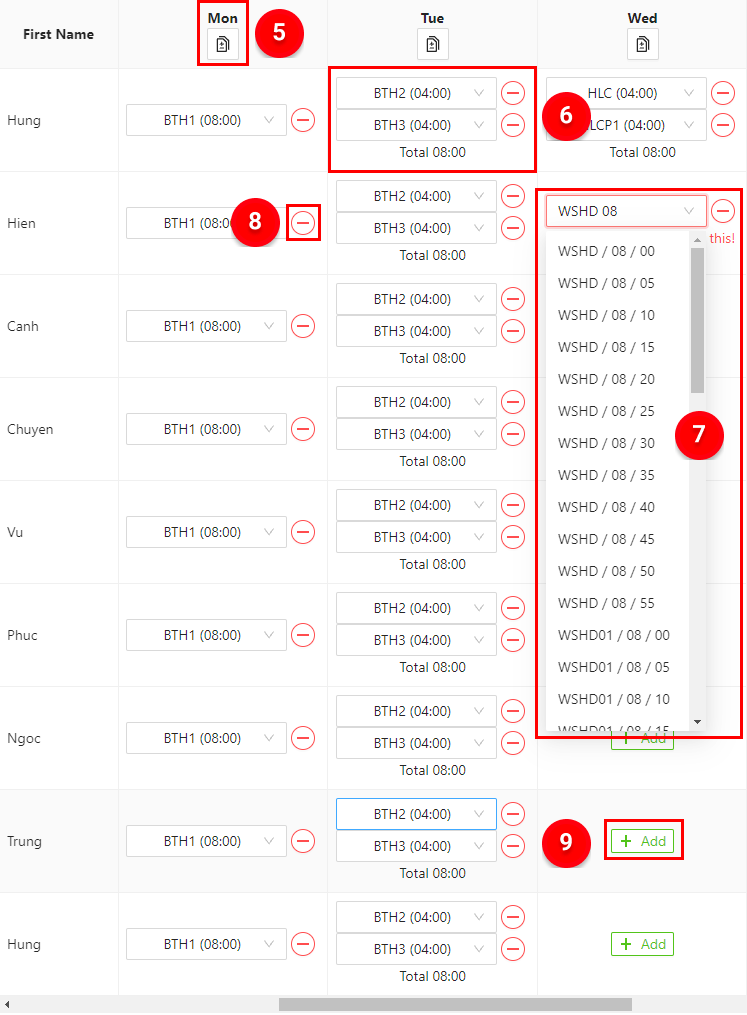
![]() Member Timesheet Table – where you do a timesheet for your team like how many projects and how much time they spent on these projects respectively in a week.
Member Timesheet Table – where you do a timesheet for your team like how many projects and how much time they spent on these projects respectively in a week.
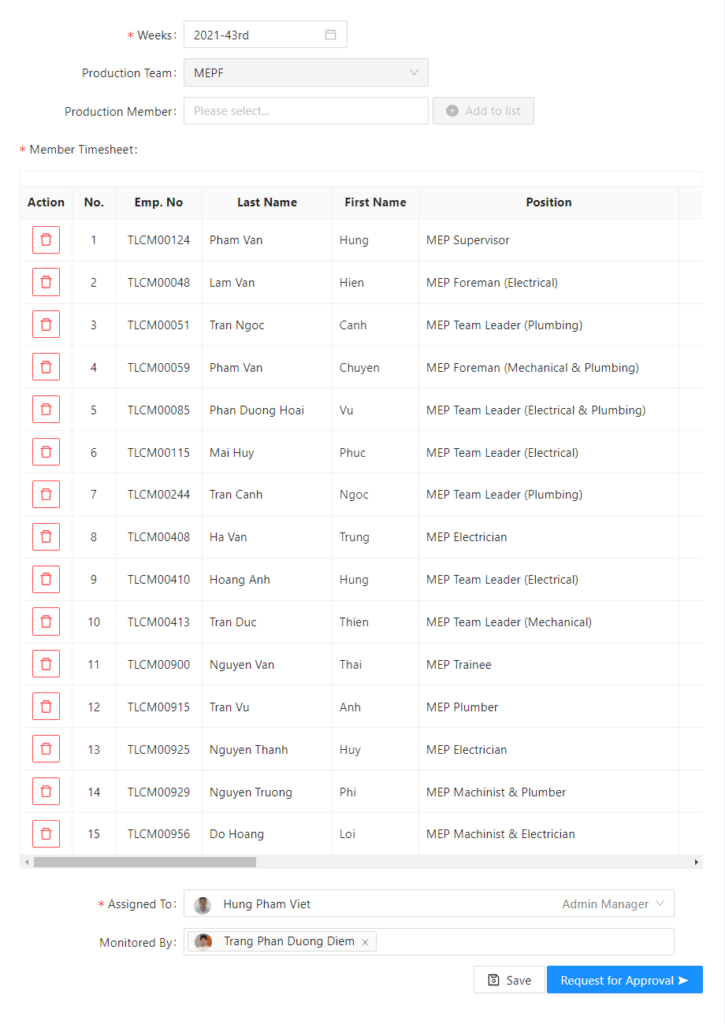
![]() Assignment – Your Approver (Assignee To) and Monitor (Followed up By) is set default, but you can edit them if they are obsolete or unsuitable in that time.
Assignment – Your Approver (Assignee To) and Monitor (Followed up By) is set default, but you can edit them if they are obsolete or unsuitable in that time.
![]() Note – There are the tips for you to input the member timesheet correctly and easily as below:
Note – There are the tips for you to input the member timesheet correctly and easily as below:
![]() Clone first line button – clone the data of the first line vertically.
Clone first line button – clone the data of the first line vertically.
![]() You can select one project a day or several projects that your team member has done and the time spent on respectively. You can check the total hour to make sure they are enough the standard time each day. The chosen project will be disabled so that you can not select it again, but you can adjust its hour.
You can select one project a day or several projects that your team member has done and the time spent on respectively. You can check the total hour to make sure they are enough the standard time each day. The chosen project will be disabled so that you can not select it again, but you can adjust its hour.
![]() You input the data fast by typing the project and the working time.
You input the data fast by typing the project and the working time.
![]() If you want to delete a project selected wrongly, just click on the red minus symbol.
If you want to delete a project selected wrongly, just click on the red minus symbol.
![]() Add new data.
Add new data.
Remember to save the timesheet regularly to prevent sudden interruption circumstances.
View Register
This page shows the members who are booked the timesheet by their supervisors. It helps the HR staff check whether these members have been booked their timesheets or not.
- Drop down the list and select a workplace.
- The date range tool for filtering the duration.
- The results are the color-coded ID. These colors stand for the document status. You can click on the ID to open the document.
- Export CSV file for handling other reports.
View Report
This page shows you the optional report in the table depending on your demand.
There are three types of reports shown in the content table here: By Employee, By Team, By Project. They can be filtered by date range.
The filtered result is shown and filtered by your position.
You also can export the CSV file to handle other reports.